


December 24th, 2013 by Stinkhead

My six year old son has been talking about secret labs and mad scientists for almost a year. I caught an epiphany looking at used play kitchens at a consignment sale. I could spray that one black and make it a mad scientist lab…. I was really surprised that I could pull the whole thing off for less than $50, but make a pretty memorable toy. Click below for pics and how-to.

I started poking around Craigslist right after Thanksgiving. I was hoping more people would be motivated to sell old toys as they make room for the holiday present onslaught. I saw lots of great kitchens that would make terrific labs, but I was pretty sure I could find one for $20. Luckily for me, I didn’t need any of the accessories or electronic features to function. This particular Step 2 kitchen seemed perfect. It was a little bit smaller in real life, and I really wanted a flat surface, like a table, for doing experiments, and plenty of storage to stow the mad scientist toys we already had. This kitchen didn’t have any flat surface, and the drawers were not enough, so I bought a stackable shelf/tub system from WalMart for $15. I then picked up a can of Krylon Fusion for Plastics for $5.

I recommend two coats, but actually, one coat looks cool if you’re going for a more weathered look. The paint stuck pretty well, and has shown no signs of flaking off. Be sure to remove all the decals before beginning. One thing I recommend doing (that I neglected to do) was give the whole thing a once-over with some Clorox disinfectant wipes. I picked this up and immediately took it to a friends house to paint and store it for a few days so my son wouldn’t see it. I kinda assumed that if you were selling something on Craigslist, you’d clean it first. Silly me. There was some sticky gunk that prevented the paint from sticking right behind the stove. After the first coat dried, I scrubbed at it a bit, and the second coat stuck just fine.

I had some toys and props to populate it, but I really wanted to add some decals to nail the mad scientist look. I created four sheets of stickers in Adobe Illustrator. Once I printed these out on full sheet labels (address labels without the slices) I trimmed them specifically to each spot I had in mind. If you’re interested in doing something similar, here is my PDF of labels. Most of these illustrations are sized for areas I had on my kitchen, but the last sheet is just extra Classified and Biohazard stickers you can put anywhere.

I had been saving this slime for awhile, but you can find it any toy store. Also, I knew I was going to be making this right after Halloween, so I stocked up on post-Halloween sales. The test tubes are Hexbug Nano tubes, I poured some glow in the dark paint into two of them, and make the rack out of cardboard. I was thinking of adding a small battery operated black light (like they sell to help you find invisible pet stains) to the interior roof, that would make the glow stuff glow during the day.

I’m really proud of the Dial of Doom. I collected a bunch of warning icons and set them in a circle. Starting at 12:00, there’s Poison (skull), Bomb, Danger, Fire, Biohazard, Death (by lightning zap), Magnet, Laser Beams, Explosion, High Voltage, and Radiation. I didn’t spray paint the dials so much that they didn’t spin, but be mindful that you may need to mask the area or break through the paint seal later.

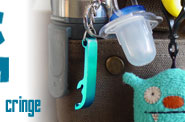
What mad scientist lab is complete without a dungeon? I wanted the hands to be green so it was clearly a monster, and not a person.

I turned the Microwave into a radiation chamber. Not too far of a stretch there. I got the lifesized glow in the dark skull at a post halloween sale.

I made the ice machine into a “Scan-o-Tron” I wish the sticker had gone in a little bit smoother, but it looks alright. I put several things inside like his tube of glow in the dark Moon Rocks and some squishy toys.

I wanted to utilize the different doors in different ways. Where as the microwave and fridge opened like a door, the oven opened top-down. So I thought toxic waste storage would fit space that well. I also didn’t absolutely coat the interior in paint, so it has a rusty dingy look inside.

Here is the inside with that rusty look. I kind of randomly placed all these old “gross” toys through out, I’m hoping as he get more toys and collects more oddities, he places them where he wants through out. I do find the weirdest “souvenirs” in his room.

One thing that really took this into the stratosphere was the $10 Plasma ball from CVS. I felt like the lab should be “breathing” or twitching. In the movies they always have bubbling potions, smokey cauldrons, whirling gadgets, and those Jacobs Ladders with the arcs of electricity. Not only was this safe, and cheap, but it’s also fun to really play with. Bonus, the base fits perfectly within the ring of the old stove burner. This was the first thing I bought, and it was like an inspiration to make everything else.

We needed to have a brain in a jar. I mean, that’s a given. This is a roughly “life sized” brain I got from Oriental Trading. It even lights up. I got a wide mouth jar from WalMart to put it in. Ok, so now it’s all done, time for the reveal.

I wrapped up a Dissect an Alien playset for our tree-time. When he opened it, I told him it would be best to put it in his lab downstairs. He was like “Oh ok dad….” If a six year old could roll his eyes, he was doing. I ran down and turned on the plasma ball and the candle. He came down and noticed I had cleared a large spot in front of the fire place.

He loved it. Here he is posing with his new lab. We had the labcoat from when we cosplayed as Doc and Marty from BTTF. I gave him a sheet of random biohazard and classified stickers and we had fun putting those all over the place. Here is the PDF of labels one more time. If you make something similar, let me know!
Here are a few additional pictures
|
|
Posted in 3&up, advice, article, Boys, crafts, DIY, gifts, Girls, good deals, how to, kids, toddler, toys | Comments Off on DIY Mad Scientist Lab (under $50)